For a final product of this module we had to create a gallery in 3Ds showing previous works inside like an art show.
to the left and just below are my gallery in 2 seperate stages of construction. i went for an old japanesse styled house for my gallerey.
Here is my gallerey before i added lighting, you can clearly see the grass, stone pathing and orniments, the wooden decking and beams around the house you my also notice Tatami mats!
Before i added lights i increases the size of the ground and added more trees, i increases the size of the grounds so that light coming from inside the building is easily seen.
as you can see light is coming through the windows and making patterns on the grass
i added a light at the back of the house just so that the outer wall can be seen .
now time for close ups of the exhibitions within the mansion!
here you can see three of my works
'Spring Rabbit'
'Fall Rabbit' and
'Shadow'
In this close you can see
'Summer Rabbit'
in this one you can see
'HEX'
and in this one you can see
'Winter Rabbit'
'Franchesca Valentine' and a wallpaper i got of the internet
and one last time a screen shot from outside!
Hope you enjoy!
Thursday, 7 April 2011
3Ds max Lesson 7 Animation

Thursday, 31 March 2011
3Ds max lesson 6 Lighting Boolean and making things with Liiines!
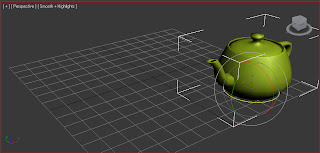
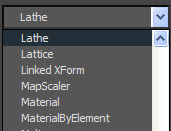
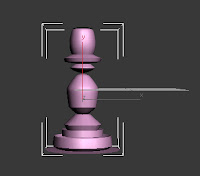
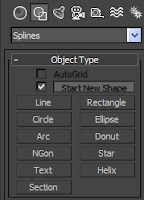 To create a line you must 1st select the second icon on the tab as shown to the left, after creating half of your shape go to modify and find lathe, after clicking it you shall get a completed 3D shape as shown below as well.
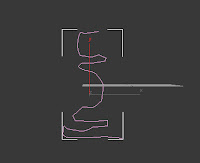
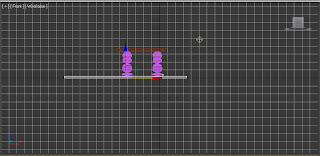
Now lets make a table, after creating your shape from line and lathe, multiply it by holding down the 'SHIFT' key and using the postioning tool 'pull out' a copied object, after this select both by holding 'Ctrl' and selecting both table legs then hold SHIFT pull out 2 more table legs to complete the set.
 Now make a box and place it above the legs, copy this box and move it above its self, now shrink its length and width but it crease its thickness/height. now copy this one as well and move it to the side, now move the box hovering over the table into the table itself you can move it so that it goes all the way through or partially. after this select the table, just the table not its legs. now as shown below select 'Compound Objects' and select 'Boolean'. still got the table selected? Yes good now click 'Pick Operand B' then select the box that is within the table and it should dissapear leaving a gap in the table where it was postioned.
 now move the box we made earlier into that space and add wood and a glassy texture to the shapes.
Now lets add light, on the creating tab select the lamp icon then go to standard select Omni and on the 'General Parameters' box tick the 'On' box this will allow shadows to bee seen on a rendered image. now just postion your light and 'Bobs your Uncle' your done.
3Ds max lesson 5 Editable poly
To begin with right click your desired object go down to ' Convert To' and select Editable poly.
This will automaticlay send you to the modify section, the only difference is that you now have several more options. By selecting different modes , as shown below, you can modify your shape in different ways. The 1st one shown here allows you to modify any corner on your shape independitly, as you can see the corners have been played with.
The next selection allows you to move the edges of your shape, below one edge is being moved . By selecting the ' Face' modfier then selecting 'bevel' as shown below you can Pull out or push in the chosen face after clicking once you can then enlarge or shrink the face to.
Once all this has been done if you wish you can smooth out the edges of your shape to give it a refined look. as shown below. To do this you go into the modify options, then you can simply type in M then scroll down to find MeshSmooth, after this has been selected you can change how smooth the object becomes. Its best not to go over three dunno why i was just told that.
Another modify selection allows you to select a surface instead of the enire object, if you've given your shape segments as shown below, take not that to give your shape segements this has to be altered before the shape is made as shown in the Paramteres section below.
Now using this modify method along with segments allows you to select different faces and as an example add a material without affecting the whole shape.
You could also use some of the methods above to alter it, as shown below using the modify option that allows you to move and alter corners you can move abouth thecorners of each segment.
Friday, 25 March 2011
3Ds max Lesson 4 Textures oppacity and other stuff
Material editor: These spheres represent different materials as you can see the bottom one has had a wood texture added to it.
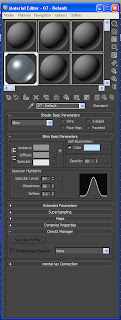
Below is a full image of the material editor as you can see the sphere here looks slightly see through that's because the opacity has been decreased to give a window effect, it also looks shiny that's because its specular levels and gloss have been increased
This is an example of an object that has used a regular material and opacity.

Below is a full image of the material editor as you can see the sphere here looks slightly see through that's because the opacity has been decreased to give a window effect, it also looks shiny that's because its specular levels and gloss have been increased
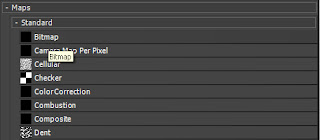
To get an imaged attached to a sphere you have to scroll down on the editor till you get to 'maps' open it up and find 'diffuse colour' tick the box next to it then click the 'none' next to it double click 'bitmap' as displayed below then chose the texture you desire.

This is an example of an object that has used a regular material and opacity.
Subscribe to:
Comments (Atom)


